Bottom Navigation and Tab bar in Flutter
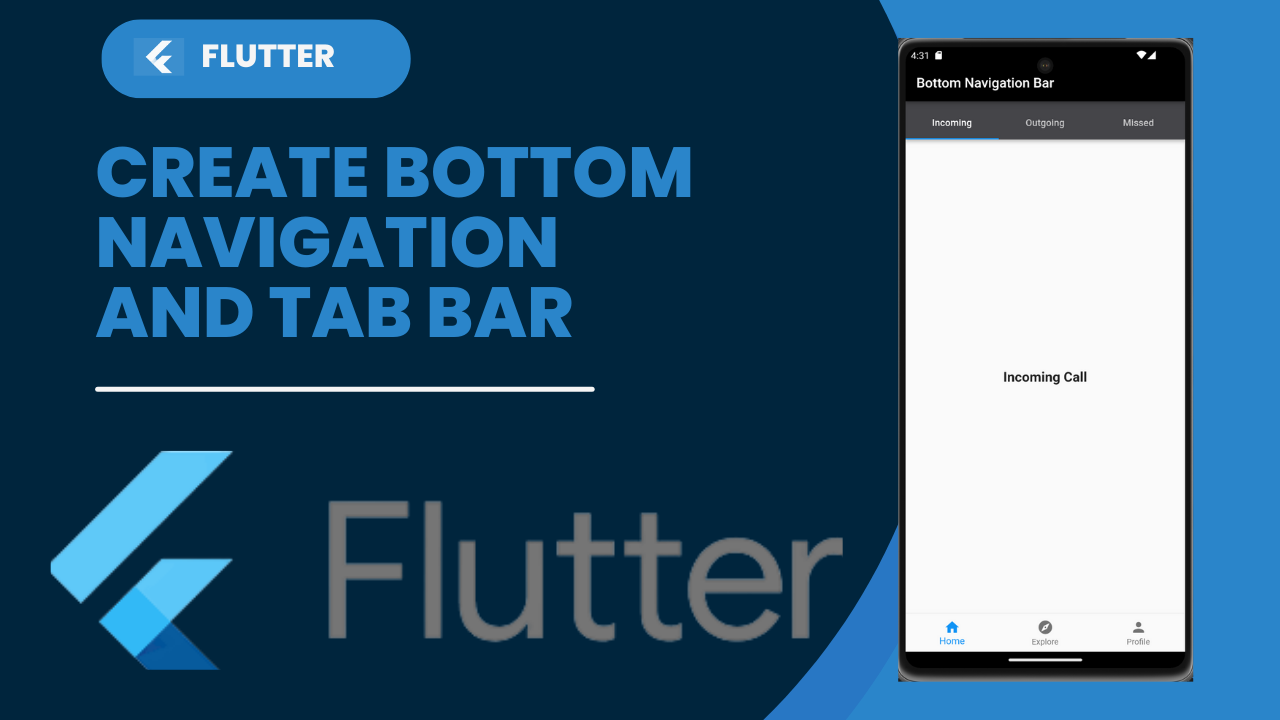
Bottom Navigation and Tab bar in Flutter Using the material.dart package for Flutter, we get a Material Design bottom navigation widget, called bottomNavigationBar.
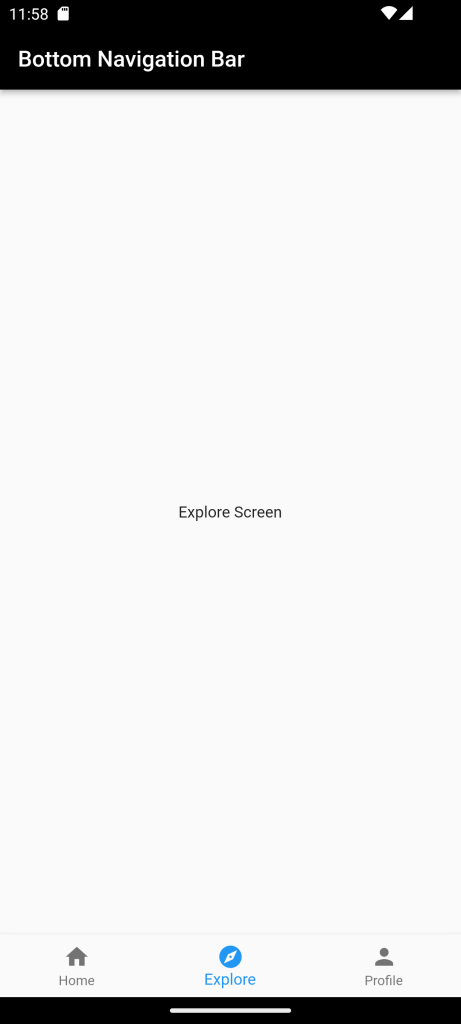
Let’s create a widget that uses the bottomNavigationBar widget. In lib/screens, add a folder called home and inside this folder create a file called home_screen.dart. Here is the code in the file we created. It contains three items in the bottom navigation tab.
selectedIndex — keeps value of the current index
widgetOptions — is an array which contains references for the content per bottom navigation item. At the moment, we just declare text, which means on every selected item in bottom navigation you will see just text. Later on in this article, I will show you how to create a list that will be display when pressing on a particular navigation item.
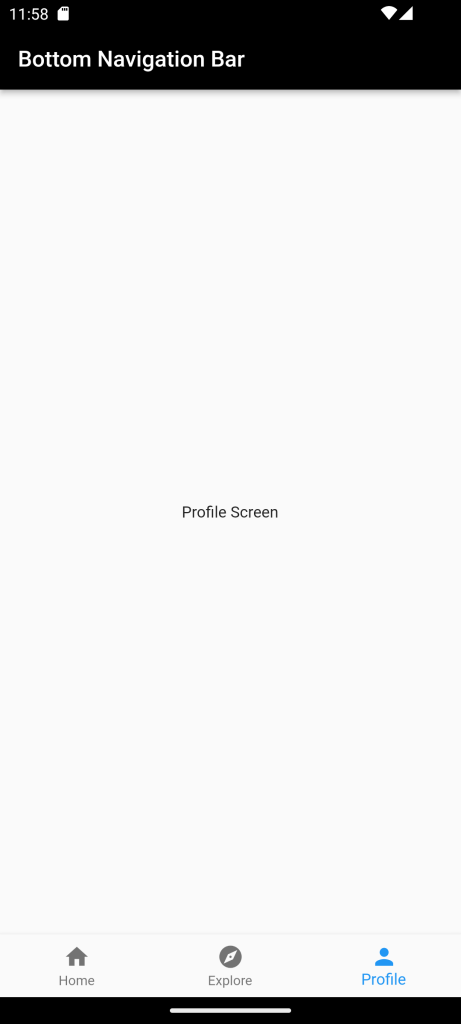
In the build method, I declared body with the current selected index from widgetOptions and I also added the most important part, which is the bottomNavigationBar widget. We’ve included three items, which are BottomNavigationBarItem widgets. Each item has an icon and text label. BottomNavigationBar accepts a property onTap. This property defines the callback function for handling a press. In our case, it switches selectedIndex for the value that has been tap.
class MyApp extends StatefulWidget {
  @override
  _MyAppState createState() => _MyAppState();
}

class _MyAppState extends State<MyApp> {
  int _selectedIndex = 0;

  static List<Widget> _widgetOptions = <Widget>[
    HomeScreen(),
    ExploreScreen(),
    ProfileScreen(),
  ];

  void _onItemTapped(int index) {
    setState(() {
      _selectedIndex = index;
    });
  }

  @override
  Widget build(BuildContext context) {
    return MaterialApp(
      debugShowCheckedModeBanner: false,
      title: 'Flutter Bottom Navigation Bar',
      theme: ThemeData(
        primarySwatch: Colors.blue,
      ),
      routes: {
        '/home': (context) => HomeScreen(),
        '/explore': (context) => ExploreScreen(),
        '/profile': (context) => ProfileScreen(),
      },
      home: Scaffold(
        appBar: AppBar(
          title: Text('Bottom Navigation Bar'),
        ),
        body: _widgetOptions.elementAt(_selectedIndex),
        bottomNavigationBar: BottomNavigationBar(
          items: const <BottomNavigationBarItem>[
            BottomNavigationBarItem(
              icon: Icon(Icons.home),
              label: 'Home',
            ),
            BottomNavigationBarItem(
              icon: Icon(Icons.explore),
              label: 'Explore',
            ),
            BottomNavigationBarItem(
              icon: Icon(Icons.person),
              label: 'Profile',
            ),
          ],
          currentIndex: _selectedIndex,
          onTap: _onItemTapped,
        ),
      ),
    );
  }
}
TabBar with BottomNavigationBar
The tabs are mainly used for mobile navigation. The styling of tabs is different for different operating systems.
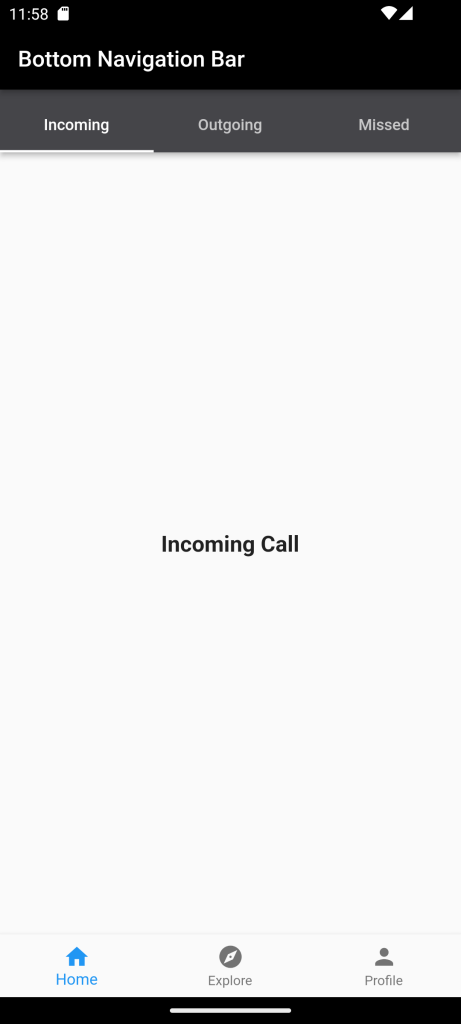
To add tabs to the app, we need to create a TabBar and TabBarView and attach them with the TabController. The controller will sync both so that we can have the behavior which we need.
Sometimes a single page is not enough to cover a wide range of subcategories within a parent category inside BottomNavigationBar. For example, the Google Play Store app has subcategories labeled For you, Top charts, Kids, etc. A scenario like this calls for the Flutter Tabbar widget.
DefaultTabController(
  // The number of tabs to display.
  length: 2,
  child: // Complete this code in the next step.
);
DefaultTabController(
length: 2,
child: Scaffold(
appBar: AppBar(
bottom: TabBar(
tabs: [
Tab(icon: Icon(Icons.directions_car)),
Tab(icon: Icon(Icons.directions_bike)),
],
),
),
),
); Create content for each tab so that when a tab is select, it displays the content. For this purpose, we have to use the TabBarView widget as
TabBarView(
  children: [
  ],
);
class HomeScreen extends StatelessWidget {
@override
Widget build(BuildContext context) {
return DefaultTabController(
length: 3,
child: Scaffold(
appBar: AppBar(
backgroundColor: dash,
flexibleSpace: Column(
mainAxisAlignment: MainAxisAlignment.end,
children: [
TabBar(
tabs: [
Tab(
text: 'Incoming',
),
Tab(
text: 'Outgoing',
),
Tab(
text: 'Missed',
),
],
)
],
),
),
body: TabBarView(
children: [
IncomingPage(),
OutgoingPage(),
MissedPage(),
],
),
),
);
}
}TabBar with BottomNavigationBar
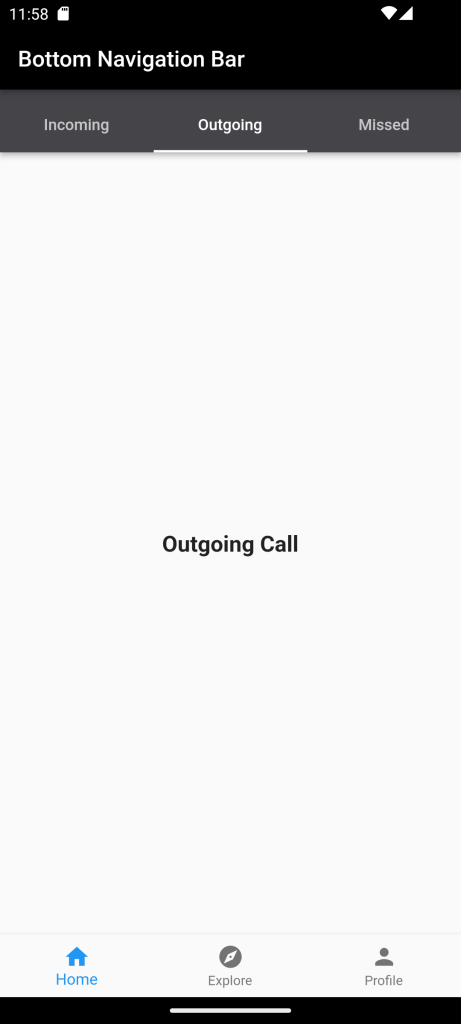
Full Code:Bottom Navigation and Tab bar in Flutter
import 'package:demo1/Constant/color.dart';
import 'package:flutter/material.dart';
void main() {
runApp(MyApp());
}
class MyApp extends StatefulWidget {
@override
_MyAppState createState() => _MyAppState();
}
class _MyAppState extends State<MyApp> {
int _selectedIndex = 0;
static List<Widget> _widgetOptions = <Widget>[
HomeScreen(),
ExploreScreen(),
ProfileScreen(),
];
void _onItemTapped(int index) {
setState(() {
_selectedIndex = index;
});
}
@override
Widget build(BuildContext context) {
return MaterialApp(
debugShowCheckedModeBanner: false,
title: 'Flutter Bottom Navigation Bar',
theme: ThemeData(
primarySwatch: Colors.blue,
),
routes: {
'/home': (context) => HomeScreen(),
'/explore': (context) => ExploreScreen(),
'/profile': (context) => ProfileScreen(),
},
home: Scaffold(
appBar: AppBar(
backgroundColor: black,
title: Text('Bottom Navigation Bar'),
),
body: _widgetOptions.elementAt(_selectedIndex),
bottomNavigationBar: BottomNavigationBar(
items: const <BottomNavigationBarItem>[
BottomNavigationBarItem(
icon: Icon(Icons.home),
label: 'Home',
),
BottomNavigationBarItem(
icon: Icon(Icons.explore),
label: 'Explore',
),
BottomNavigationBarItem(
icon: Icon(Icons.person),
label: 'Profile',
),
],
currentIndex: _selectedIndex,
onTap: _onItemTapped,
),
),
);
}
}
class HomeScreen extends StatelessWidget {
  @override
  Widget build(BuildContext context) {
    return DefaultTabController(
      length: 3,
      child: Scaffold(
        appBar: AppBar(
          backgroundColor: dash,
          flexibleSpace: Column(
            mainAxisAlignment: MainAxisAlignment.end,
            children: [
              TabBar(
                tabs: [
                  Tab(
                    text: 'Incoming',
                  ),
                  Tab(
                    text: 'Outgoing',
                  ),
                  Tab(
                    text: 'Missed',
                  ),
                ],
              )
            ],
          ),
        ),
        body: TabBarView(
          children: [
            IncomingPage(),
            OutgoingPage(),
            MissedPage(),
          ],
        ),
      ),
    );

  }
}
class IncomingPage extends StatelessWidget {
@override
Widget build(BuildContext context) {
return Container(
child: Center(
child: Text(
'Incoming Call',
style: TextStyle(fontSize: 20, fontWeight: FontWeight.bold),
),
),
);
}
}
class OutgoingPage extends StatelessWidget {
@override
Widget build(BuildContext context) {
return Container(
child: Center(
child: Text(
'Outgoing Call',
style: TextStyle(fontSize: 20, fontWeight: FontWeight.bold),
),
),
);
}
}
class MissedPage extends StatelessWidget {
@override
Widget build(BuildContext context) {
return Container(
child: Center(
child: Text(
'Missed Call',
style: TextStyle(fontSize: 20, fontWeight: FontWeight.bold),
),
),
);
}
}
class ExploreScreen extends StatelessWidget {
@override
Widget build(BuildContext context) {
return Container(
child: Center(
child: Text('Explore Screen'),
),
);
}
}
class ProfileScreen extends StatelessWidget {
@override
Widget build(BuildContext context) {
return Container(
child: Center(
child: Text('Profile Screen'),
),
);
}
}
For More: To know about CustomTabbar in Flutter.




Leave a Reply