Chat App UI With Flutter:These days, many people use chat applications to communicate with team members, friends, and family via their smart phones. This makes these messaging applications an essential medium of communication.
Flutter app development has taken the world by storm in terms of cross-platform mobile application development. You can use it to create pixel-perfect UIs, and many development companies use Flutter today.
In this tutorial, I am going to introduce you to a mix of both: we’re going to build a chat app UI entirely on the Flutter/Dart coding environment. Along with learning the awesome Chat UI implementation in Flutter,
How to Create a New Flutter Project
First, we need to create a new Flutter project. For that, make sure that you’ve installed the Flutter SDK and other Flutter app development-related requirements.
If everything is properly set up, then in order to create a project we can simply run the following command in our desired local directory:
How to Create the Main Home Screen UI
Now, we are going to start building the UI for our chat application. The Main Home Screen
- the conversation screen, which we are going to implement as a separate page.
First, we need to make some simple configurations to the default boilerplate code in the main.dart file. We’ll remove some default code and add the simple MaterialApp pointing to the empty Container as a home page for now:
import 'package:flutter/material.dart';

void main() {
  runApp(MyApp());
}

class MyApp extends StatelessWidget {
  @override
  Widget build(BuildContext context) {
    return MaterialApp(
      title: 'Flutter Demo',
      theme: ThemeData(
        primarySwatch: Colors.blue,
      ),
      debugShowCheckedModeBanner: false,
      home: Container(),
    );
  }
}
Now in place of the empty Container widget, we are going to call the HomePage screen widget. But first, we need to implement the screen.
How to Build the Main Home Screen
Inside the ./lib directory of our root project folder, we need to create a folder called ./screens. This folder will hold all the dart files for different screens.
Inside ./lib/screens/ directory, we need to create a file called homePage.dart. Inside the homePage.dart file, we need to add the basic Stateless widget code as shown in the code snippet below:
import 'package:flutter/material.dart';

class HomePage extends StatelessWidget{
  @override
  Widget build(BuildContext context) {
    return Scaffold(
      body: Container(
        child: Center(child: Text("Chat")),
      ),

    );
  }
}
How to Build the Conversation List Screen
Here, we are going to create the conversation list section which will contain a header section, a search bar, and the conversation list view.
First, inside the ./lib/screens folder, we need to create a new dart file called chatPage.dart. Then, add a simple stateful widget class template inside as shown in the code snippet below:
import 'package:flutter/material.dart';

class ChatPage extends StatefulWidget {
  @override
  _ChatPageState createState() => _ChatPageState();
}

class _ChatPageState extends State<ChatPage> {
  @override
  Widget build(BuildContext context) {
    return Scaffold(
      body: SingleChildScrollView(
        child: Center(child: Text("Chat")),
      ),
    );
  }
}
How to Build a Chat Detail Screen
Now, we are going to create a chat detail screen. For that, we need to create a new file called chatDetailPage.dart inside the ./lib/screens/ folder.
How to Set Up the Messages List Section in Chat Screen
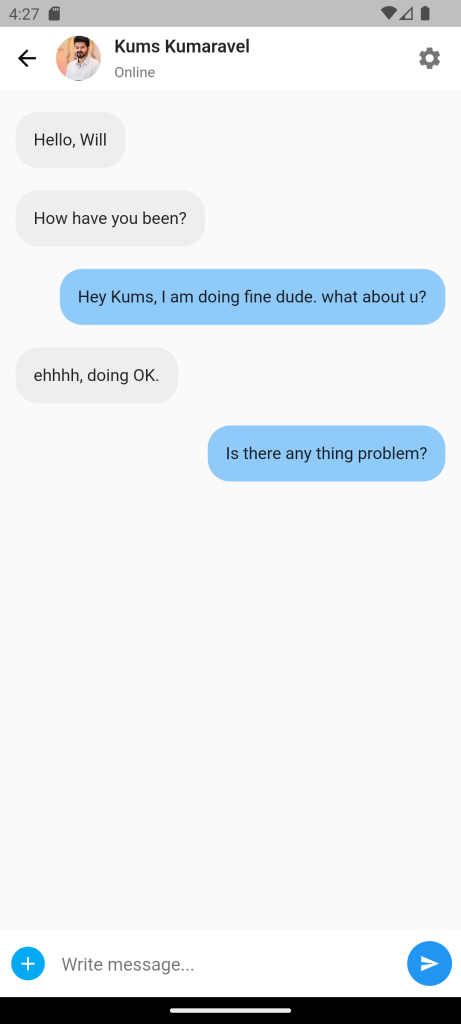
Now, we are going to create the UI for messages appearing in the chat detail screen.
First, we need to create a model that reflects the message instance object.
class ChatMessage{
  String messageContent;
  String messageType;
  ChatMessage({required this.messageContent, required this.messageType});
}
For that, we need to create a file called chatMessageModel.dart inside the ./models folder and define the class object as follows:
Here, we are going to add a custom App bar at the top of the chat detail screen. For that, we are going to use the AppBar widget with various parameter configurations as shown in the code snippet below:
How to Style and Position the Messages Based on Sender and Receiver
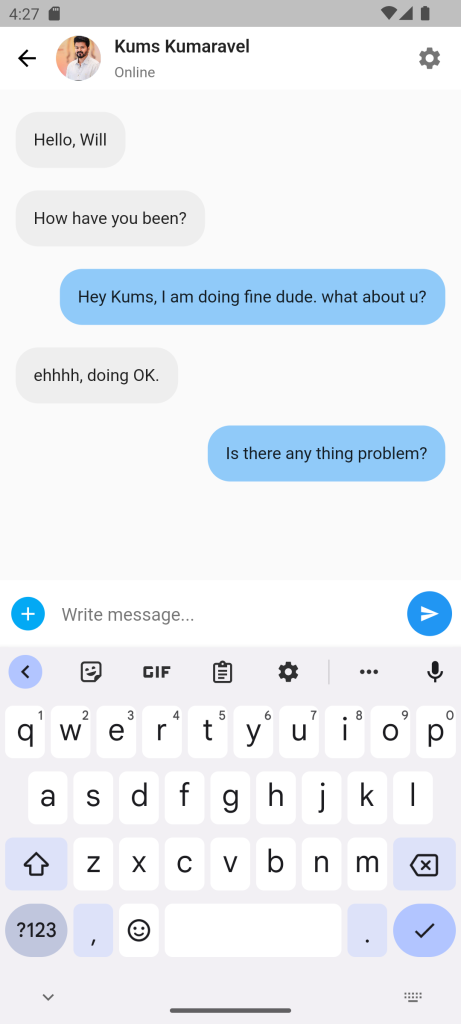
Now, we are going to style the message list so that it appears as a chat message bubble. We’re also going to position them based on the message type using the Align widget as shown in the code snippet below:
ListView.builder(
  itemCount: messages.length,
  shrinkWrap: true,
  padding: EdgeInsets.only(top: 10,bottom: 10),
  physics: NeverScrollableScrollPhysics(),
  itemBuilder: (context, index){
    return Container(
      padding: EdgeInsets.only(left: 14,right: 14,top: 10,bottom: 10),
      child: Align(
        alignment: (messages[index].messageType == "receiver"?Alignment.topLeft:Alignment.topRight),
        child: Container(
          decoration: BoxDecoration(
            borderRadius: BorderRadius.circular(20),
            color: (messages[index].messageType  == "receiver"?Colors.grey.shade200:Colors.blue[200]),
          ),
          padding: EdgeInsets.all(16),
          child: Text(messages[index].messageContent, style: TextStyle(fontSize: 15),),
        ),
      ),
    );
  },
),
Full Code:Chat App UI With Flutter
import 'package:demo1/chatMessageModel.dart';
import 'package:flutter/material.dart';

class ChatDetailPage extends StatefulWidget {
  @override
  _ChatDetailPageState createState() => _ChatDetailPageState();
}

List<ChatMessage> messages = [
  ChatMessage(messageContent: "Hello, Tamil", messageType: "receiver"),
  ChatMessage(messageContent: "How have you been?", messageType: "receiver"),
  ChatMessage(
      messageContent: "Hey Kums, I am doing fine dude. what about u?",
      messageType: "sender"),
  ChatMessage(messageContent: "ehhhh, doing OK.", messageType: "receiver"),
  ChatMessage(
      messageContent: "Is there any thing problem?", messageType: "sender"),
];

class _ChatDetailPageState extends State<ChatDetailPage> {
  @override
  Widget build(BuildContext context) {
    return Scaffold(
      appBar: AppBar(
        elevation: 0,
        automaticallyImplyLeading: false,
        backgroundColor: Colors.white,
        flexibleSpace: SafeArea(
          child: Container(
            padding: EdgeInsets.only(right: 16),
            child: Row(
              children: <Widget>[
                IconButton(
                  onPressed: () {
                    Navigator.pop(context);
                  },
                  icon: Icon(
                    Icons.arrow_back,
                    color: Colors.black,
                  ),
                ),
                SizedBox(
                  width: 2,
                ),
                CircleAvatar(
                  backgroundImage: NetworkImage(
                      'https://igimages.gumlet.io/tamil/home/thalapathy68diwali272023m.jpg?w=376&dpr=2.6'),
                  maxRadius: 20,
                ),
                SizedBox(
                  width: 12,
                ),
                Expanded(
                  child: Column(
                    crossAxisAlignment: CrossAxisAlignment.start,
                    mainAxisAlignment: MainAxisAlignment.center,
                    children: <Widget>[
                      Text(
                        "Kums Kumaravel",
                        style: TextStyle(
                            fontSize: 16, fontWeight: FontWeight.w600),
                      ),
                      SizedBox(
                        height: 6,
                      ),
                      Text(
                        "Online",
                        style: TextStyle(
                            color: Colors.grey.shade600, fontSize: 13),
                      ),
                    ],
                  ),
                ),
                Icon(
                  Icons.settings,
                  color: Colors.black54,
                ),
              ],
            ),
          ),
        ),
      ),
      body: Stack(
        children: <Widget>[
          ListView.builder(
            itemCount: messages.length,
            shrinkWrap: true,
            padding: EdgeInsets.only(top: 10, bottom: 10),
            physics: NeverScrollableScrollPhysics(),
            itemBuilder: (context, index) {
              return Container(
                padding:
                    EdgeInsets.only(left: 14, right: 14, top: 10, bottom: 10),
                child: Align(
                  alignment: (messages[index].messageType == "receiver"
                      ? Alignment.topLeft
                      : Alignment.topRight),
                  child: Container(
                    decoration: BoxDecoration(
                      borderRadius: BorderRadius.circular(20),
                      color: (messages[index].messageType == "receiver"
                          ? Colors.grey.shade200
                          : Colors.blue[200]),
                    ),
                    padding: EdgeInsets.all(16),
                    child: Text(
                      messages[index].messageContent,
                      style: TextStyle(fontSize: 15),
                    ),
                  ),
                ),
              );
            },
          ),
          Align(
            alignment: Alignment.bottomLeft,
            child: Container(
              padding: EdgeInsets.only(left: 10, bottom: 10, top: 10),
              height: 60,
              width: double.infinity,
              color: Colors.white,
              child: Row(
                children: <Widget>[
                  GestureDetector(
                    onTap: () {},
                    child: Container(
                      height: 30,
                      width: 30,
                      decoration: BoxDecoration(
                        color: Colors.lightBlue,
                        borderRadius: BorderRadius.circular(30),
                      ),
                      child: Icon(
                        Icons.add,
                        color: Colors.white,
                        size: 20,
                      ),
                    ),
                  ),
                  SizedBox(
                    width: 15,
                  ),
                  Expanded(
                    child: TextField(
                      decoration: InputDecoration(
                          hintText: "Write message...",
                          hintStyle: TextStyle(color: Colors.black54),
                          border: InputBorder.none),
                    ),
                  ),
                  SizedBox(
                    width: 15,
                  ),
                  FloatingActionButton(
                    onPressed: () {},
                    child: Icon(
                      Icons.send,
                      color: Colors.white,
                      size: 18,
                    ),
                    backgroundColor: Colors.blue,
                    elevation: 0,
                  ),
                ],
              ),
            ),
          ),
        ],
      ),
    );
  }
}


For More : To know about Whatsapp Chat Clone in Flutter


Leave a Reply