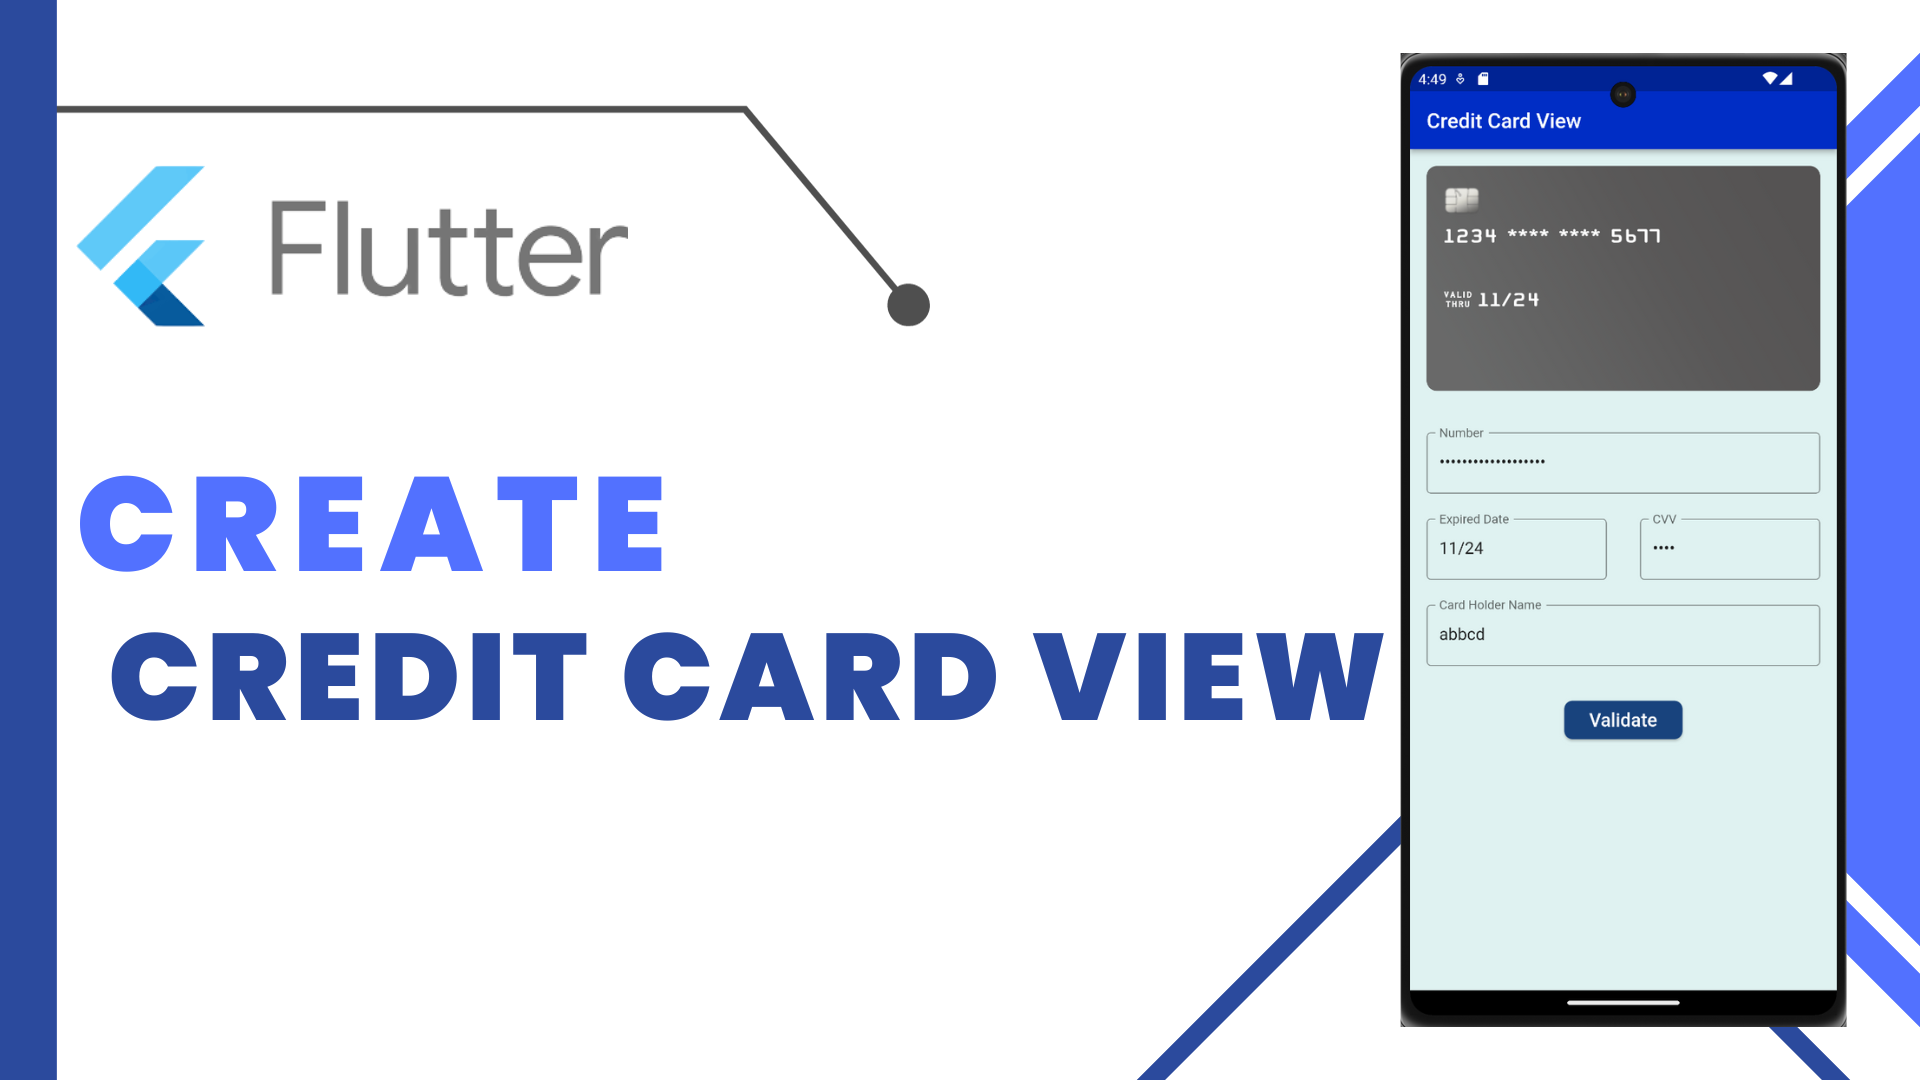
Credit Card View In Flutter: We will see how to implement the Credit cards UI easily with the Card detection using the flutter_credit_card package in your flutter applications.
Flutter Credit Card:
A Credit Card widget package, uphold entering card details, card flip animation. A Flutter package permits you to effectively implement the Credit card’s UI easily with Card detection.
Add dependencies to pubspec — yaml file.
dependencies:
  flutter_credit_card: ^4.0.1
Import Package:
import 'package:flutter_credit_card/flutter_credit_card.dart';Create a new dart file called credit_card_page.dart inside the lib folder.
CreditCardWidget(
  cardNumber: cardNumber,
  expiryDate: expiryDate,
  cardHolderName: cardHolderName,
  cvvCode: cvvCode,
  showBackView: isCvvFocused,
),
In CreditCardWidget() has some required fields that cannot be null, such as cardNumber means the user can add our card number for card detecting, expiryDate means the user can add our card expiry date in a month and year format, cardHolderName means the user can add our name of the person on the front of the credit card, cvvCode means the user can add our cvv number is a 3-digit code printed at the back of a credit or a debit card, showBackView means true when you want to show cvv(back) view.
CreditCardWidget(
        cardNumber: cardNumber,
        expiryDate: expiryDate,
        cardHolderName: cardHolderName,
        cvvCode: cvvCode,
        showBackView: isCvvFocused,
        cardbgColor: Colors.black,
        obscureCardNumber: true,
        obscureCardCvv: true,
        height: 175,
        textStyle: TextStyle(color: Colors.yellowAccent),
        width: MediaQuery.of(context).size.width,
        animationDuration: Duration(milliseconds: 1000),
    ),
CreditCardWidget() also has some optional parameters that let you modify this widget as per your need. Like add a cardbgColor means the user add any color, height, width, obscureCardNumber, obscureCardCvvanimation-duration, etc.
Implementation of CreditCard :
CreditCardForm(
  formKey: formKey,
  onCreditCardModelChange: onCreditCardModelChange,
  obscureCvv: true,
  obscureNumber: true,
  inputConfiguration: InputConfiguration(
   cardNumberDecoration: const InputDecoration(
     border: OutlineInputBorder(),
     labelText: 'Number',
     hintText: 'XXXX XXXX XXXX XXXX',
   ),
   expiryDateDecoration: const InputDecoration(
     border: OutlineInputBorder(),
     labelText: 'Expired Date',
     hintText: 'XX/XX',
   ),
   cvvCodeDecoration: const InputDecoration(
     border: OutlineInputBorder(),
     labelText: 'CVV',
     hintText: 'XXX',
   ),
   cardHolderDecoration: InputDecoration(
     border: OutlineInputBorder(),
     labelText: 'Card Holder Name',
   ),
  ),
  cardHolderName: '',
  cardNumber: '',
  cvvCode: '',
  expiryDate: '',
 ),
In this CreditCardForm(), we will add a formkey. Users can create the final globalkey.
final GlobalKey<FormState> formKey = GlobalKey<FormState>();
void onCreditCardModelChange(CreditCardModel creditCardModel) {
  setState(() {
    cardNumber = creditCardModel.cardNumber;
    expiryDate = creditCardModel.expiryDate;
    cardHolderName = creditCardModel.cardHolderName;
    cvvCode = creditCardModel.cvvCode;
    isCvvFocused = creditCardModel.isCvvFocused;
  });
}
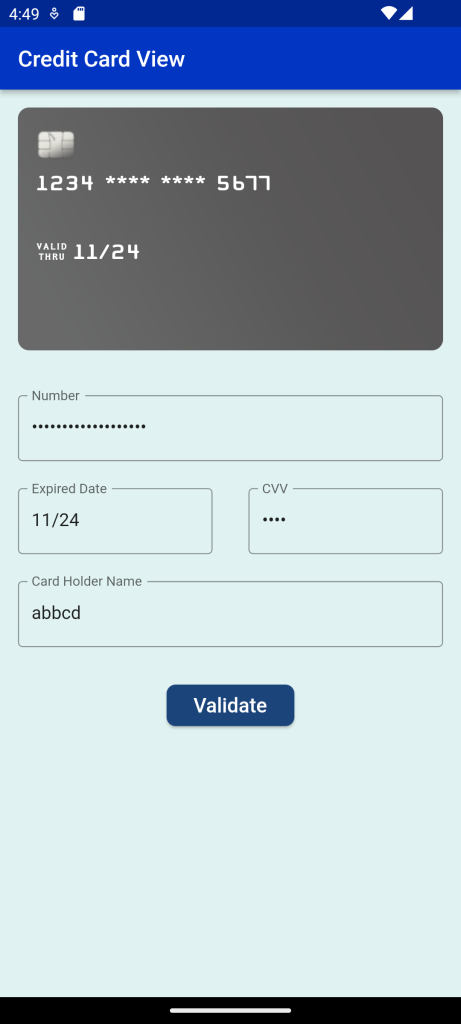
Add a cardNumberDecoration means users can write a card number on this decoration box and show it on our credit card. expiryDateDecoration means users can write an expiry date on this decoration box and show it on our credit card. cvvCodeDecoration means users can write a cvv code on this decoration box, and then the card will allow animated reverse and show it on our credit card. cardHolderDecoration means users can write the person’s name on the credit card’s front on this decoration box and show it on our credit card.
MaterialButton(
  shape: RoundedRectangleBorder(
    borderRadius: BorderRadius.circular(8.0),
  ),
  child: Container(
    margin: const EdgeInsets.all(8),
    child: const Text(
      'Validate',
      style: TextStyle(
        color: Colors.white,
        fontSize: 18,
      ),
    ),
  ),
  color: const Color(0xff1b447b),
  onPressed: () {
    if (formKey.currentState!.validate()) {
      print('valid!');
      _showValidDialog(context,"Valid","Your card successfully valid !!!");
    } else {
      print('invalid!');
    }
  },
)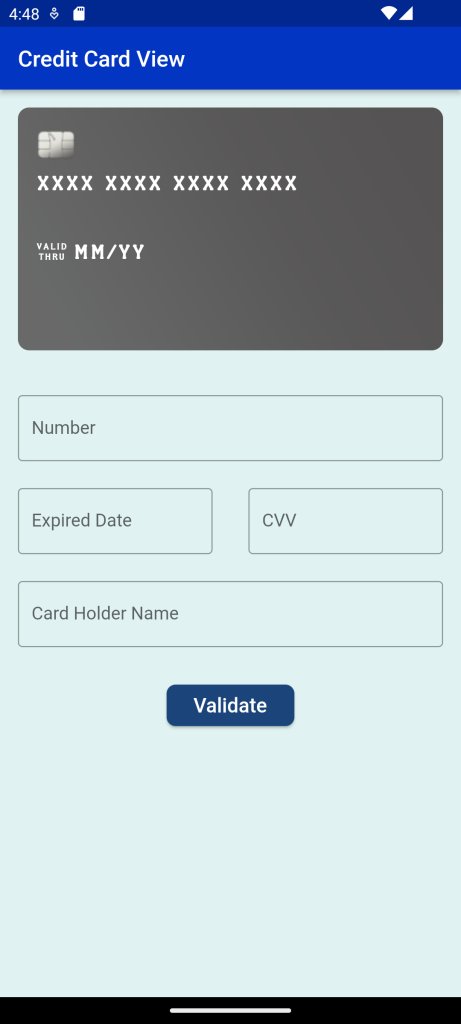
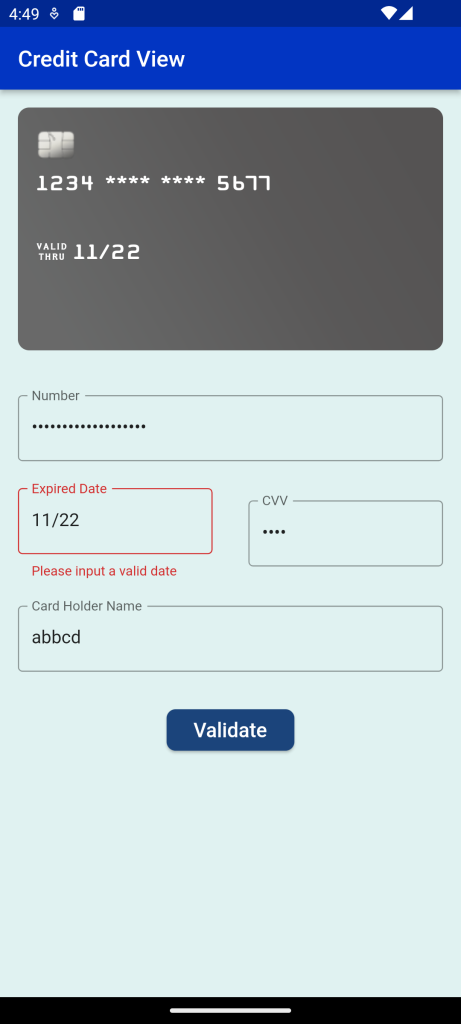
In the MaterialButton(), we will add the text “validate” and wrap it to the container. onPressed method, we will add if fromkey is validated, then print valid and open a _showValidDialog(). Otherwise, they will give an error.
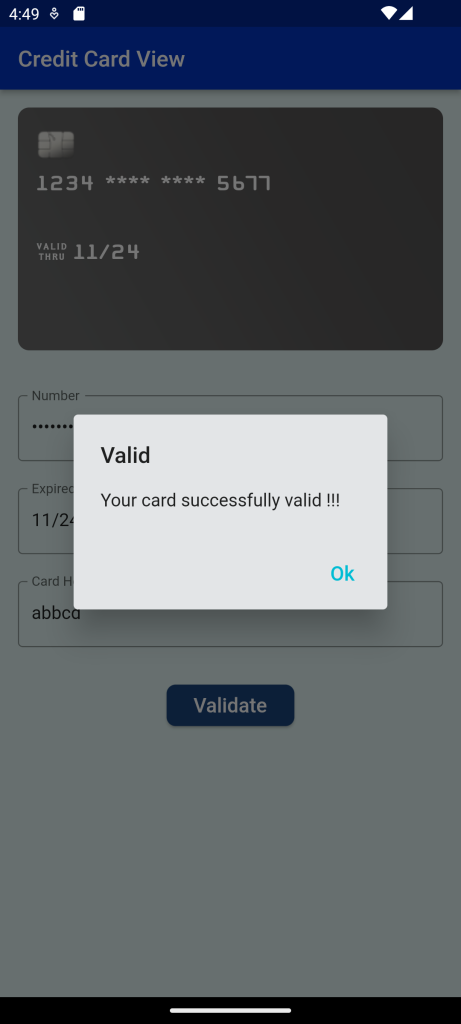
In this dialog, we will add context, return an AlertDailog(). Inside AlertDialog, we will title, content, and actions. When we run the application, we ought to get the screen’s output like the underneath screen capture.
_showValidDialog(BuildContext context, String title, String content,) {
  showDialog<AlertDialog>(
    context: context,
    builder: (BuildContext context) {
      return AlertDialog(
        backgroundColor: Color(0xff1b447b),
        title: Text(title),
        content: Text(content),
        actions: [
          FlatButton(
              child: Text(
                "Ok",
                style: TextStyle(fontSize: 18,color: Colors.cyan),
              ),
              onPressed: () {
               Navigator.of(context).pop();
              }),
        ],
      );
    },
  );
}


Full Code:Credit Card View In Flutter
import 'package:demoproject/Constant/color.dart';
import 'package:flutter/material.dart';
import 'package:flutter_credit_card/flutter_credit_card.dart';

class CreditCardPage extends StatefulWidget {
  @override
  State<StatefulWidget> createState() {
    return CreditCardPageState();
  }
}

class CreditCardPageState extends State<CreditCardPage> {
  String cardNumber = '';
  String expiryDate = '';
  String cardHolderName = '';
  String cvvCode = '';
  bool isCvvFocused = false;
  final GlobalKey<FormState> formKey = GlobalKey<FormState>();

  @override
  Widget build(BuildContext context) {
    return Scaffold(
      backgroundColor: Colors.teal[50],
      appBar: AppBar(
        backgroundColor: Blue,
        automaticallyImplyLeading: false,
        title: Text('Credit Card View'),
      ),
      resizeToAvoidBottomInset: true,
      body: SafeArea(
        child: Column(
          children: <Widget>[
            CreditCardWidget(
              cardBgColor: Color.fromARGB(255, 85, 83, 83),
              cardNumber: cardNumber,
              expiryDate: expiryDate,
              cardHolderName: cardHolderName,
              cvvCode: cvvCode,
              showBackView: isCvvFocused,
              obscureCardNumber: true,
              obscureCardCvv: true,
              onCreditCardWidgetChange: (CreditCardBrand) {},
            ),
            Expanded(
              child: SingleChildScrollView(
                child: Column(
                  children: [
                    CreditCardForm(
                      formKey: formKey,
                      onCreditCardModelChange: onCreditCardModelChange,
                      obscureCvv: true,
                      obscureNumber: true,
                      inputConfiguration: InputConfiguration(
                        cardNumberDecoration: const InputDecoration(
                          border: OutlineInputBorder(),
                          labelText: 'Number',
                          hintText: 'XXXX XXXX XXXX XXXX',
                        ),
                        expiryDateDecoration: const InputDecoration(
                          border: OutlineInputBorder(),
                          labelText: 'Expired Date',
                          hintText: 'XX/XX',
                        ),
                        cvvCodeDecoration: const InputDecoration(
                          border: OutlineInputBorder(),
                          labelText: 'CVV',
                          hintText: 'XXX',
                        ),
                        cardHolderDecoration: InputDecoration(
                          border: OutlineInputBorder(),
                          labelText: 'Card Holder Name',
                        ),
                      ),
                      cardHolderName: '',
                      cardNumber: '',
                      cvvCode: '',
                      expiryDate: '',
                    ),
                    SizedBox(
                      height: 20,
                    ),
                    MaterialButton(
                      shape: RoundedRectangleBorder(
                        borderRadius: BorderRadius.circular(8.0),
                      ),
                      child: Container(
                        margin: const EdgeInsets.all(8),
                        child: const Text(
                          'Validate',
                          style: TextStyle(
                            color: Colors.white,
                            fontSize: 18,
                          ),
                        ),
                      ),
                      color: const Color(0xff1b447b),
                      onPressed: () {
                        if (formKey.currentState!.validate()) {
                          print('valid!');
                          _showValidDialog(context, "Valid",
                              "Your card successfully valid !!!");
                        } else {
                          print('invalid!');
                        }
                      },
                    )
                  ],
                ),
              ),
            ),
          ],
        ),
      ),
    );
  }

  _showValidDialog(
    BuildContext context,
    String title,
    String content,
  ) {
    showDialog<AlertDialog>(
      context: context,
      builder: (BuildContext context) {
        return AlertDialog(
          backgroundColor: Color(0xff1b447b),
          title: Text(title),
          content: Text(content),
          actions: [
            TextButton(
                child: Text(
                  "Ok",
                  style: TextStyle(fontSize: 18, color: Colors.cyan),
                ),
                onPressed: () {
                  Navigator.of(context).pop();
                }),
          ],
        );
      },
    );
  }

  void onCreditCardModelChange(CreditCardModel creditCardModel) {
    setState(() {
      cardNumber = creditCardModel.cardNumber;
      expiryDate = creditCardModel.expiryDate;
      cardHolderName = creditCardModel.cardHolderName;
      cvvCode = creditCardModel.cvvCode;
      isCvvFocused = creditCardModel.isCvvFocused;
    });
  }
}
For more: To know about Vertical Card Pager in Flutter





Leave a Reply