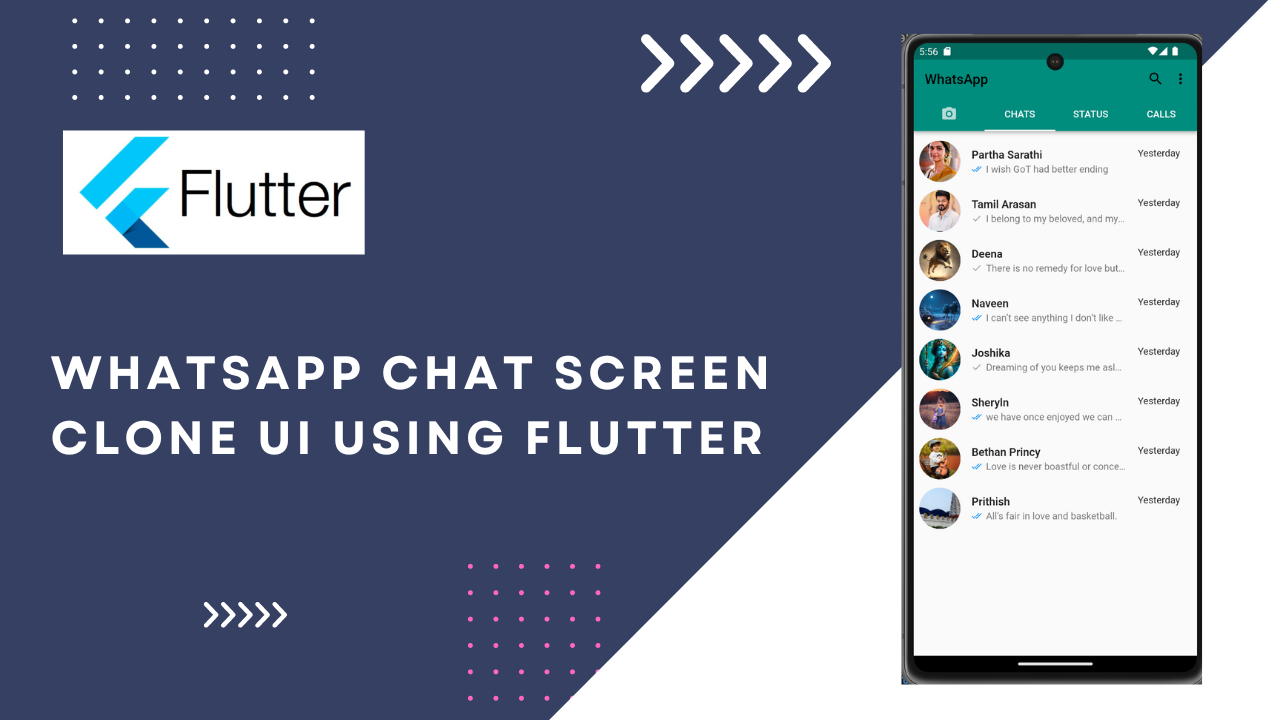
Whatsapp Clone in Flutter:In this series of Flutter UI designs, I’ll try to show you how with Flutter, it becomes very easy to replicate some of the renowned apps we use on our daily basis.
What better way to start the series off than with WhatsApp. Probably the most used Social Media Application in the world.
I know it doesn’t look like the Original WhatsApp but we’ll get there together. Step-by-step. Let’s start with the AppBar.
- Search button and three-Dot Menu parallel to WhatsApp text.
- Tabs to open Camera, Chats, Status, Calls.
For The search button and the three-dot Menu Button, AppBar widget has a property called actions that takes in a list of Widgets. We can use an Icon widget to get a search button.
For the three-dot Menu, There’s a widget called PopupMenuButton in Flutter with which we can get as many Popup items as we need in the form of a list.
import 'package:flutter/material.dart';

void main() {
  runApp(const MyApp());
}

class MyApp extends StatelessWidget {
  const MyApp({Key? key}) : super(key: key);

  // This widget is the root of your application.
  @override
  Widget build(BuildContext context) {
    return MaterialApp(
      title: 'Flutter Demo',
      theme: ThemeData(
        primarySwatch: Colors.blue,
      ),
      home: const MyHomePage(),
    );
  }
}

class MyHomePage extends StatelessWidget {
  const MyHomePage({Key? key}) : super(key: key);

  @override
  Widget build(BuildContext context) {
    return DefaultTabController(
      length: 4,
      child: Scaffold(
          appBar: AppBar(
            actions: [
              // Widget for the search button
              InkWell(child: const Icon(Icons.search), onTap:(){
                // Implement Search functionality here
              }),
              // Widget for implementing the three-dot menu
              PopupMenuButton(
                shape: RoundedRectangleBorder(
                  borderRadius: BorderRadius.circular(20),
                ),
                itemBuilder: (context) {
                  return [
                    // In this case, we need 5 popupmenuItems one for each option.
                    const PopupMenuItem(child: Text('New Group')),
                    const PopupMenuItem(child: Text('New Broadcast')),
                    const PopupMenuItem(child: Text('Linked Devices')),
                    const PopupMenuItem(child: Text('Starred Messages')),
                    const PopupMenuItem(child: Text('Settings')),
                  ];
                },
              ),
            ],
            backgroundColor: const Color(0xff128C7E),
            title: const Text('WhatsApp'),
          ),
          body: const Center(child: Text('Hello World'))
          ),
    );
  }
}
Now let’s get to the Tabs Implementation, For that we’ll get the help of AppBar’s bottom property and provider it with TabBar widget which takes in list of tabs.
For every Tab selected, We can show a different view to the User using the TabBarView widget which we can use in the body but we’ll get there later on in this article.
import 'package:flutter/material.dart';

void main() {
  runApp(const MyApp());
}

class MyApp extends StatelessWidget {
  const MyApp({Key? key}) : super(key: key);

  // This widget is the root of your application.
  @override
  Widget build(BuildContext context) {
    return MaterialApp(
      title: 'Flutter Demo',
      theme: ThemeData(
        primarySwatch: Colors.blue,
      ),
      home: const MyHomePage(),
    );
  }
}

class MyHomePage extends StatelessWidget {
  const MyHomePage({Key? key}) : super(key: key);

  Widget openPopUp() {
    return PopupMenuButton(
      itemBuilder: (context) {
        return List.generate(
            3,
            (index) => const PopupMenuItem(
                  child: Text('Setting'),
                ));
      },
    );
  }

  @override
  Widget build(BuildContext context) {
    return DefaultTabController(
      length: 4,
      child: Scaffold(
          appBar: AppBar(

            actions: [
              // Widget for the search
              const Icon(Icons.search),
              // Widget for implementing the three-dot menu
              PopupMenuButton(
                shape: RoundedRectangleBorder(
                  borderRadius: BorderRadius.circular(20),
                ),
                itemBuilder: (context) {
                  return [
                    // In this case, we need 5 popupmenuItems one for each option.
                    const PopupMenuItem(child: Text('New Group')),
                    const PopupMenuItem(child: Text('New Broadcast')),
                    const PopupMenuItem(child: Text('Linked Devices')),
                    const PopupMenuItem(child: Text('Starred Messages')),
                    const PopupMenuItem(child: Text('Settings')),
                  ];
                },
              ),
            ],
            backgroundColor: const Color(0xff128C7E),
            title: const Text('WhatsApp'),
            bottom: const TabBar(
              indicatorSize: TabBarIndicatorSize.tab,
              indicatorColor: Colors.white,
              tabs: [
                Tab(
                    iconMargin: EdgeInsets.all(100),
                    child: Icon(
                      Icons.camera_alt_rounded,
                    )),
                Tab(
                  child: Text('CHATS', style: TextStyle(color: Colors.white)),
                ),
                Tab(
                  child: Text('STATUS', style: TextStyle(color: Colors.white)),
                ),
                Tab(
                  child: Text('CALLS', style: TextStyle(color: Colors.white)),
                ),
              ],
              labelColor: Colors.white,
            ),
          ),
          body: const Center(child: Text('Hello World'))


    );
  }
}
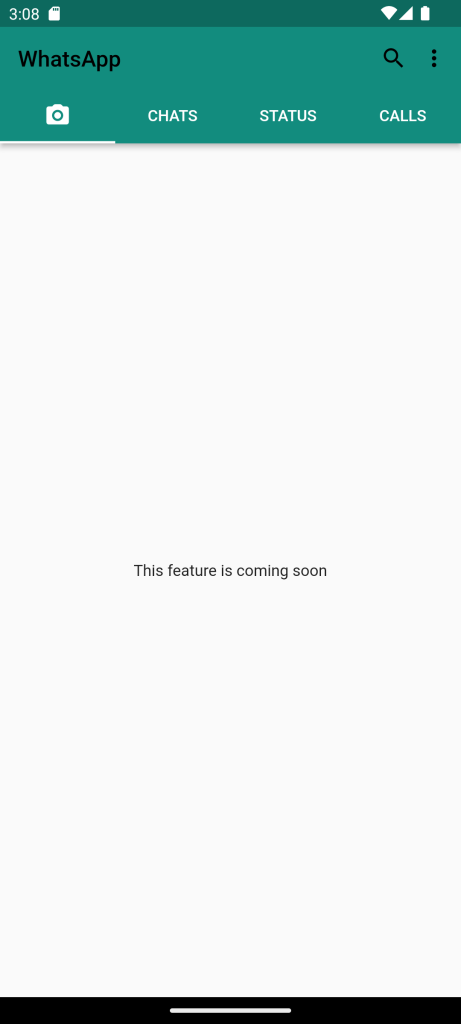
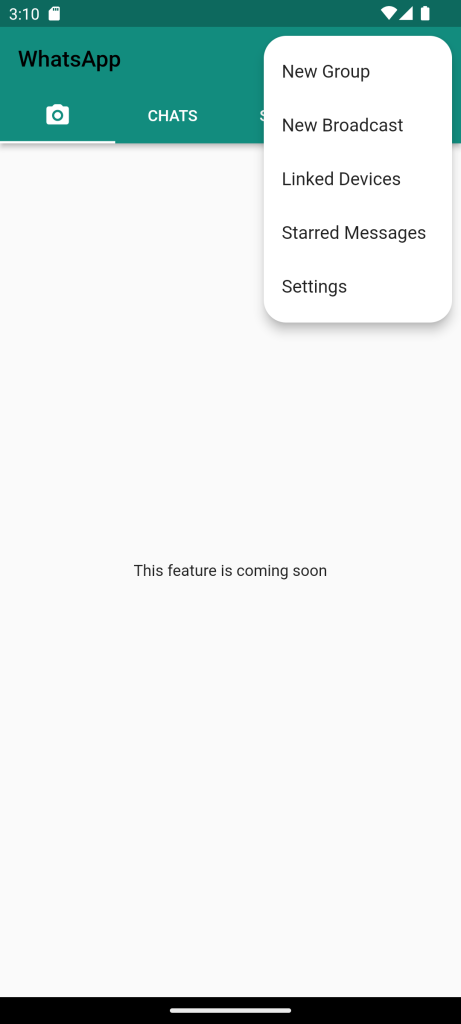
I think we’re pretty much done with the AppBar. Since the first tab Camera requires a functionality and that’s beyond the scope of this article.we’ll ignore that and create a Single Tab Views for Chats, Status, Calls tab.
Chats Tab:
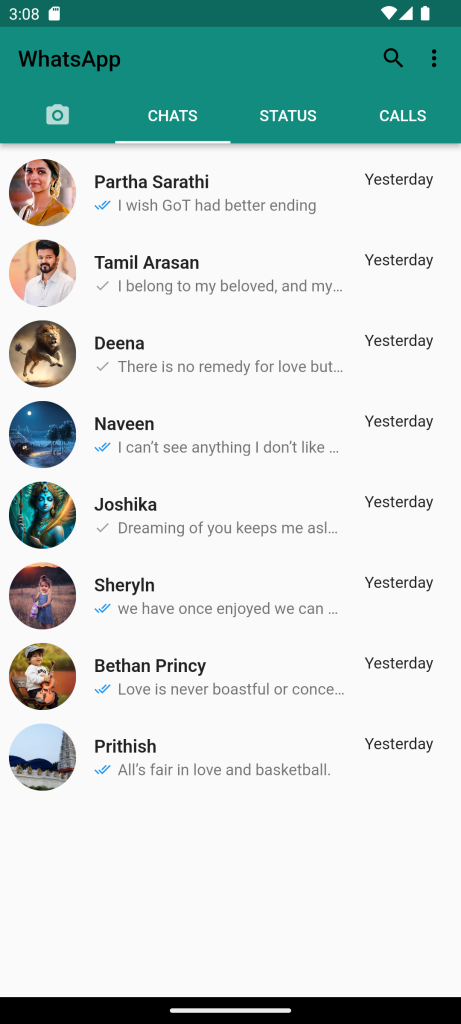
Lets Make the Chats Tab View First. For that we need to break down the layout. In WhatsApp Chat Screen. We have a profile picture, Username, last message,status of the message and the timestamp. Let’s first see how to UI would look and then dive into the code implementation.
Full Code:Whatsapp Clone in Flutter
import 'package:flutter/material.dart';

class MyHomePage extends StatelessWidget {
  const MyHomePage({Key? key}) : super(key: key);

  Widget openPopUp() {
    return PopupMenuButton(
      itemBuilder: (context) {
        return List.generate(
            3,
            (index) => const PopupMenuItem(
                  child: Text('Setting'),
                ));
      },
    );
  }

  @override
  Widget build(BuildContext context) {
    return DefaultTabController(
      length: 4,
      child: Scaffold(
        appBar: AppBar(
          actions: [
            // Widget for the search
            const Icon(Icons.search),
            // Widget for implementing the three-dot menu
            PopupMenuButton(
              shape: RoundedRectangleBorder(
                borderRadius: BorderRadius.circular(20),
              ),
              itemBuilder: (context) {
                return [
                  // In this case, we need 5 popupmenuItems one for each option.
                  const PopupMenuItem(child: Text('New Group')),
                  const PopupMenuItem(child: Text('New Broadcast')),
                  const PopupMenuItem(child: Text('Linked Devices')),
                  const PopupMenuItem(child: Text('Starred Messages')),
                  const PopupMenuItem(child: Text('Settings')),
                ];
              },
            ),
          ],
          backgroundColor: const Color(0xff128C7E),
          title: const Text('WhatsApp'),
          bottom: const TabBar(
            indicatorSize: TabBarIndicatorSize.tab,
            indicatorColor: Colors.white,
            tabs: [
              Tab(
                  iconMargin: EdgeInsets.all(100),
                  child: Icon(
                    Icons.camera_alt_rounded,
                  )),
              Tab(
                child: Text('CHATS', style: TextStyle(color: Colors.white)),
              ),
              Tab(
                child: Text('STATUS', style: TextStyle(color: Colors.white)),
              ),
              Tab(
                child: Text('CALLS', style: TextStyle(color: Colors.white)),
              ),
            ],
            labelColor: Colors.white,
          ),
        ),

        // ! THE DESIGNED BODY
        body: const TabBarView(
          children: [
            Center(child: Text('This feature is coming soon')),
            ChatsTab(),
            Center(child: Text('Status feature is coming soon')),
            Center(child: Text('Call feature is coming soon')),
          ],
        ),
      ),
    );
  }
}

class ChatsTab extends StatelessWidget {
  const ChatsTab({Key? key}) : super(key: key);

  @override
  Widget build(BuildContext context) {
    return Scaffold(
      body: Padding(
        padding: const EdgeInsets.all(8.0),
        child: ListView(
          children: const [
            SingleChatWidget(
                chatTitle: "Partha Sarathi",
                chatMessage: 'I wish GoT had better ending',
                seenStatusColor: Colors.blue,
                imageUrl:
                    'https://static.toiimg.com/thumb/msid-85147219,width-1280,resizemode-4/85147219.jpg'),
            SingleChatWidget(
                chatTitle: "Tamil Arasan",
                chatMessage: 'I belong to my beloved, and my beloved is mine.',
                seenStatusColor: Colors.grey,
                imageUrl:
                    'https://igimages.gumlet.io/tamil/home/thalapathy68diwali272023m.jpg?w=376&dpr=2.6'),
            SingleChatWidget(
                chatTitle: "Deena",
                chatMessage: 'There is no remedy for love but to love more.',
                seenStatusColor: Colors.grey,
                imageUrl:
                    'https://static.vecteezy.com/system/resources/previews/021/950/361/non_2x/lion-illustration-ai-generated-free-photo.jpg'),
            SingleChatWidget(
                chatTitle: "Naveen",
                chatMessage: 'I can’t see anything I don’t like about you.',
                seenStatusColor: Colors.blue,
                imageUrl:
                    'https://e0.pxfuel.com/wallpapers/650/780/desktop-wallpaper-best-night-nature-scenery-gifs-background-beautiful-night-scenery.jpg'),
            SingleChatWidget(
                chatTitle: "Joshika",
                chatMessage: 'Dreaming of you keeps me asleep.',
                seenStatusColor: Colors.grey,
                imageUrl:
                    'https://i.pinimg.com/originals/dd/97/3a/dd973ac116a977c8dd5296b0da504b8c.jpg'),
            SingleChatWidget(
                chatTitle: "Sheryln",
                chatMessage: 'we have once enjoyed we can never lose.',
                seenStatusColor: Colors.blue,
                imageUrl:
                    'https://images.pexels.com/photos/36029/aroni-arsa-children-little.jpg?auto=compress&cs=tinysrgb&dpr=1&w=500'),
            SingleChatWidget(
                chatTitle: "Bethan Princy",
                chatMessage: 'Love is never boastful or conceited.',
                seenStatusColor: Colors.blue,
                imageUrl:
                    'https://5.imimg.com/data5/AX/OB/XJ/SELLER-26109517/child-photography-child-photo-shoot-child-photographer-child-photography-studio-in-rajkot-500x500.jpg'),
            SingleChatWidget(
                chatTitle: "Prithish",
                chatMessage: 'All’s fair in love and basketball.',
                seenStatusColor: Colors.blue,
                imageUrl:
                    'https://cms.tstdc.in/fetch?payload=78e3cfce-5f50-4c14-835c-3d5dbff85724.jpg'),
          ],
        ),
      ),
    );
  }
}

class SingleChatWidget extends StatelessWidget {
  final String? chatMessage;
  final String? chatTitle;
  final Color? seenStatusColor;
  final String? imageUrl;

  const SingleChatWidget({
    Key? key,
    this.chatMessage,
    this.chatTitle,
    this.seenStatusColor,
    this.imageUrl,
  }) : super(key: key);

  @override
  Widget build(BuildContext context) {
    return Row(
      children: [
        CircleAvatar(
          radius: 30,
          backgroundImage: NetworkImage(imageUrl!),
        ),
        Expanded(
          child: ListTile(
            title: Text('$chatTitle',
                style: const TextStyle(fontWeight: FontWeight.w600)),
            subtitle: Row(children: [
              Icon(
                seenStatusColor == Colors.blue ? Icons.done_all : Icons.done,
                size: 15,
                color: seenStatusColor,
              ),
              Expanded(
                child: Padding(
                  padding: const EdgeInsets.only(left: 6.0),
                  child: Text(
                    '$chatMessage',
                    style: const TextStyle(overflow: TextOverflow.ellipsis),
                  ),
                ),
              ),
            ]),
            trailing: Column(
              children: const [
                Padding(
                  padding: EdgeInsets.only(top: 8.0),
                  child: Text(
                    'Yesterday',
                  ),
                ),
              ],
            ),
          ),
        ),
      ],
    );
  }
}
For More: To know about Alphabetical Scroll View in Flutter




Leave a Reply