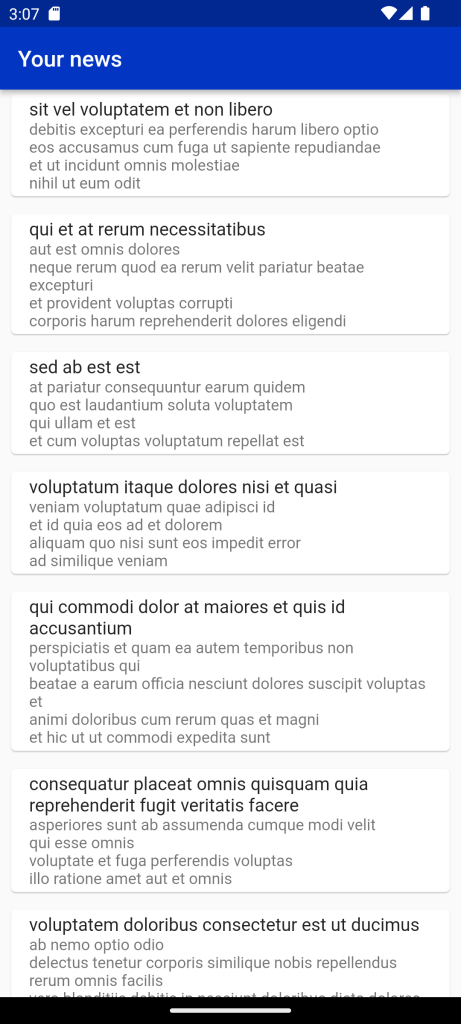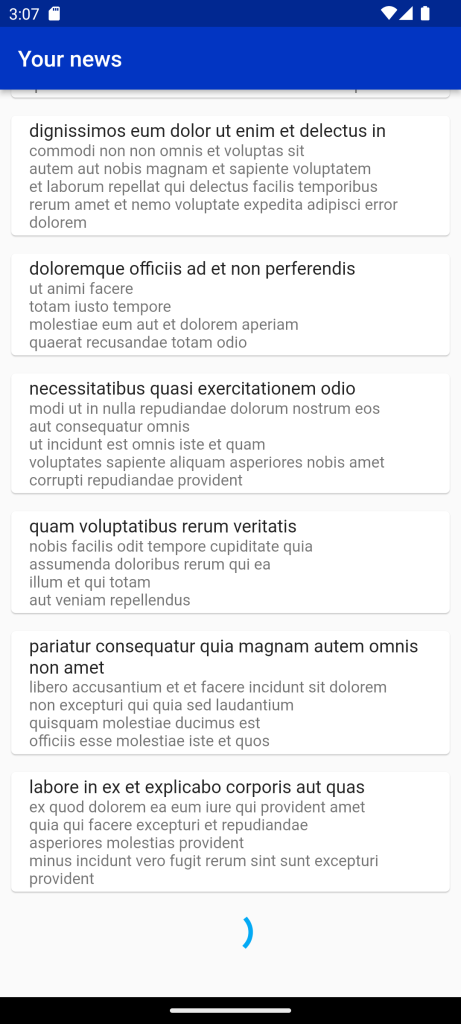
Pagination in Mobile applications:
Flutter Pagination ListView and Load More:In the context of mobile applications, pagination is commonly used in scenarios where there is a large amount of data to be displayed. Such as lists, grids, or search results. By breaking the data into smaller chunks. It becomes easier for users to browse and locate the specific information they are looking for.
Typically, pagination involves displaying a limited number of items or records on a single page and providing navigation controls. Such as next and previous buttons or swipe gestures, to move between pages. Users can move forward or backward through the pages to view additional content. Users can also scroll a list to bottom to navigate to next items.
Anatomy of pagination:
The anatomy pagination refers to the different components or elements involved in implementing pagination functionality within a user interface.
- Data set: Pagination begins with a larger data set that needs to be divided into smaller, manageable sections or pages. This data set could be a list of items, search results, or any other collection of data.
- Page size: Page size refers to the number of items or records displayed on each page. It determines how many items are visible to the user at a given time. Common page sizes include 10, 20, or 50 items per page, but it can vary depending on the specific application or requirements.
- Current page indicator: The current page indicator visually communicates to the user which page they are currently viewing within the pagination sequence. It could be a highlighted page number, a progress bar, or any other visual cue that distinguishes the current page from the rest.
- Pagination controls: Pagination controls allow users to navigate between different pages of content. These controls typically include:
- Previous page button: Users to move to the previous page.
- Next page button: Allow users to move to the next page.
- Page number buttons: Display a set of page numbers for users to directly jump to a specific page.
- These controls can be represented as buttons, links, or interactive elements that users can interact with to navigate through the paginated content.
- Total pages indicator: The total pages indicator displays the total number of pages available in the paginated data set. It helps users understand the overall scope and extent of the content.
Step 1: Implement pagination from scratch
Open main.dart file and implement these codes in it. normally this code navigates into separate classes where we write and execute the scrolling pagination code.
Step 2: Create and Open ScrollingPagination.dart file
First you create a List of items that we display inside ListView.builder.
  int _page = 0;

  final int _limit = 20;

  bool _isFirstLoadRunning = false;
  bool _hasNextPage = true;

  bool _isLoadMoreRunning = false;

  List _posts = [];
ListView.builder(
                itemCount: _posts.length,
                controller: _controller,
                itemBuilder: (_, index) => Card(
                  margin: const EdgeInsets.symmetric(
                      vertical: 8, horizontal: 10),
                  child: ListTile(
                    title: Text(_posts[index]['title']),
                    subtitle: Text(_posts[index]['body']),
                  ),
                ),
              ),
            ),
then apply the if else condition when the data not the last so the simple list other wise show the else condition inside the else condition we put CircularProgressIndicator.
_isFirstLoadRunning?const Center(
          child: CircularProgressIndicator(),
        ):Column(
          children: [
            Expanded(
              child: ListView.builder(
                itemCount: _posts.length,
                controller: _controller,
                itemBuilder: (_, index) => Card(
                  margin: const EdgeInsets.symmetric(
                      vertical: 8, horizontal: 10),
                  child: ListTile(
                    title: Text(_posts[index]['title']),
                    subtitle: Text(_posts[index]['body']),
                  ),
                ),
              ),
            ),
            if (_isLoadMoreRunning == true)
              const Padding(
                padding: EdgeInsets.only(top: 10, bottom: 40),
                child: Center(
                  child: CircularProgressIndicator(),
                ),
              ),

            if (_hasNextPage == false)
              Container(
                padding: const EdgeInsets.only(top: 30, bottom: 40),
                color: Colors.amber,
                child: const Center(
                  child: Text('You have fetched all of the content'),
                ),
              ),
          ],
        )
Next we create ScrollController and add into ListView.builder. and initState we listen to the scrollcontroller and check if they have reach the end of the list then we fetch more data. and also we dispose the ScrollController.
late ScrollController _controller;
  @override
  void initState() {
    super.initState();
    _firstLoad();
    _controller = ScrollController()..addListener(_loadMore);

  }
Scrolling Pagination with Dynamic data(API)
It’s very simple like previews one but add some more code like this you use HTTP package(http: ^1.1.0) to load some item from the server when the response code success then we get response body into newItems which add to the current item list
  final _baseUrl = 'https://jsonplaceholder.typicode.com/posts';

  int _page = 0;

  final int _limit = 20;

  bool _isFirstLoadRunning = false;
  bool _hasNextPage = true;

  bool _isLoadMoreRunning = false;

  List _posts = [];
void _loadMore() async {
    if (_hasNextPage == true &&
        _isFirstLoadRunning == false &&
        _isLoadMoreRunning == false &&
        _controller.position.extentAfter < 300
    ) {
      setState(() {
        _isLoadMoreRunning = true; // Display a progress indicator at the bottom
      });

      _page += 1; // Increase _page by 1

      try {
        final res =
        await http.get(Uri.parse("$_baseUrl?_page=$_page&_limit=$_limit"));

        final List fetchedPosts = json.decode(res.body);
        if (fetchedPosts.isNotEmpty) {
          setState(() {
            _posts.addAll(fetchedPosts);
          });
        } else {

          setState(() {
            _hasNextPage = false;
          });
        }
      } catch (err) {
        if (kDebugMode) {
          print('Something went wrong!');
        }
      }


      setState(() {
        _isLoadMoreRunning = false;
      });
    }
  }

  void _firstLoad() async {
    setState(() {
      _isFirstLoadRunning = true;
    });

    try {
      final res =
      await http.get(Uri.parse("$_baseUrl?_page=$_page&_limit=$_limit"));
      setState(() {
        _posts = json.decode(res.body);
      });
    } catch (err) {
      if (kDebugMode) {
        print('Something went wrong');
      }
    }

    setState(() {
      _isFirstLoadRunning = false;
    });
  }
Pagination is all about using conditional blocks retrieve data from server.
int _page = 0;

final int _limit = 20;

bool _isFirstLoadRunning = false;

bool _hasNextPage = true;

bool _isLoadMoreRunning = false;

List _posts = [];
The above variables are at the heart of pagination. At the same time we used a base url
‘https://jsonplaceholder.typicode.com/posts’;
Your end point should support pagination. It means it should have mechanism for getting page based limited data.


Full Code
Flutter Pagination ListView and Load More
import 'package:flutter/material.dart';
import 'package:flutter/foundation.dart';
import 'dart:convert';
import 'package:http/http.dart' as http;

void main() {
  runApp(const MyApp());
}

class MyApp extends StatelessWidget {
  const MyApp({Key? key}) : super(key: key);

  @override
  Widget build(BuildContext context) {
    return MaterialApp(
      // Remove the debug banner
        debugShowCheckedModeBanner: false,

        theme: ThemeData(
          primarySwatch: Colors.lightBlue,
        ),
        home: const HomePage());
  }
}
class HomePage extends StatefulWidget {
  const HomePage({Key? key}) : super(key: key);

  @override
  State<HomePage> createState() => _HomePageState();
}

class _HomePageState extends State<HomePage> {
  final _baseUrl = 'https://jsonplaceholder.typicode.com/posts';

  int _page = 0;

  final int _limit = 20;

  bool _isFirstLoadRunning = false;
  bool _hasNextPage = true;

  bool _isLoadMoreRunning = false;

  List _posts = [];

  void _loadMore() async {
    if (_hasNextPage == true &&
        _isFirstLoadRunning == false &&
        _isLoadMoreRunning == false &&
        _controller.position.extentAfter < 300
    ) {
      setState(() {
        _isLoadMoreRunning = true; // Display a progress indicator at the bottom
      });

      _page += 1; // Increase _page by 1

      try {
        final res =
        await http.get(Uri.parse("$_baseUrl?_page=$_page&_limit=$_limit"));

        final List fetchedPosts = json.decode(res.body);
        if (fetchedPosts.isNotEmpty) {
          setState(() {
            _posts.addAll(fetchedPosts);
          });
        } else {

          setState(() {
            _hasNextPage = false;
          });
        }
      } catch (err) {
        if (kDebugMode) {
          print('Something went wrong!');
        }
      }


      setState(() {
        _isLoadMoreRunning = false;
      });
    }
  }

  void _firstLoad() async {
    setState(() {
      _isFirstLoadRunning = true;
    });

    try {
      final res =
      await http.get(Uri.parse("$_baseUrl?_page=$_page&_limit=$_limit"));
      setState(() {
        _posts = json.decode(res.body);
      });
    } catch (err) {
      if (kDebugMode) {
        print('Something went wrong');
      }
    }

    setState(() {
      _isFirstLoadRunning = false;
    });
  }

  late ScrollController _controller;
  @override
  void initState() {
    super.initState();
    _firstLoad();
    _controller = ScrollController()..addListener(_loadMore);

  }

  @override
  Widget build(BuildContext context) {
    return Scaffold(
        appBar: AppBar(
          title: const Text('Your news', style: TextStyle(color: Colors.white),),
        ),
        body:_isFirstLoadRunning?const Center(
          child: CircularProgressIndicator(),
        ):Column(
          children: [
            Expanded(
              child: ListView.builder(
                itemCount: _posts.length,
                controller: _controller,
                itemBuilder: (_, index) => Card(
                  margin: const EdgeInsets.symmetric(
                      vertical: 8, horizontal: 10),
                  child: ListTile(
                    title: Text(_posts[index]['title']),
                    subtitle: Text(_posts[index]['body']),
                  ),
                ),
              ),
            ),
            if (_isLoadMoreRunning == true)
              const Padding(
                padding: EdgeInsets.only(top: 10, bottom: 40),
                child: Center(
                  child: CircularProgressIndicator(),
                ),
              ),

            if (_hasNextPage == false)
              Container(
                padding: const EdgeInsets.only(top: 30, bottom: 40),
                color: Colors.amber,
                child: const Center(
                  child: Text('You have fetched all of the content'),
                ),
              ),
          ],
        )
    );
  }
}
For More: To know about Theme Mode in Flutter


Leave a Reply