
Route Navigation in Flutter:Navigation and routing are some of the core concepts of all mobile application, which allows the user to move between different pages. We know that every mobile application contains several screens for displaying different types of information. For example, an app can have a screen that contains various products. When the user taps on that product, immediately it will display detailed information about that product.
The screens and pages are known as routes, and these routes are just a widget. In Android, a route is similar to an Activity, whereas, in iOS, it is equivalent to a ViewController.
In any mobile app, navigating to different pages defines the workflow of the application, and the way to handle the navigation is known as routing. Flutter provides a basic routing class MaterialPageRoute and two methods Navigator.push() and Navigator.pop() that shows how to navigate between two routes. The following steps are require to start navigation in your application.
Navigating screens in Futter :
Navigating screens in Futter with Navigator is straightforward. ‘Navigator. push()’ method is one of the effective options to move around.
Sometimes it’s hard to tackle when you need to navigate to the same screen in many parts of your application. This technique can result in code duplication.
You learned how to navigate to a new route (screen) by making a new route and pushing it to the Navigator class.
Navigator.pushNamed()
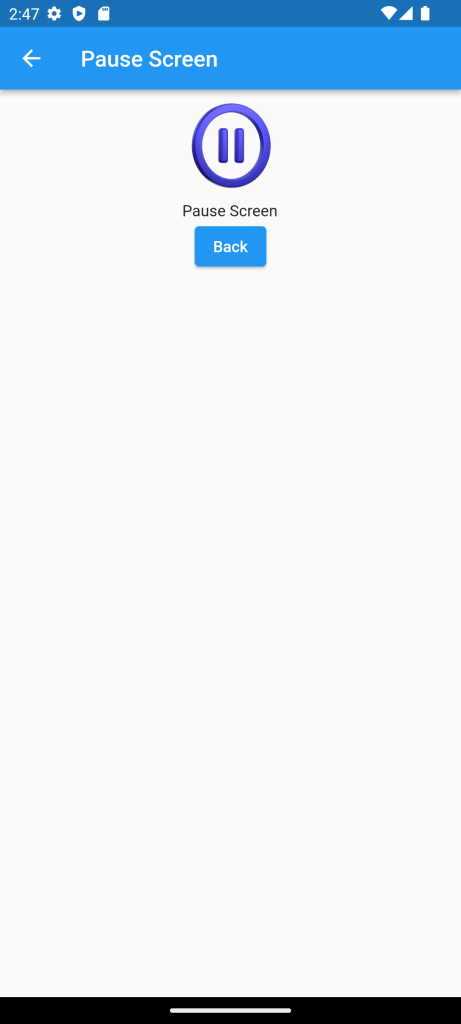
How to navigate to a new screen using named routes?
Navigator.pushNamed(context, '/pause');Here ‘/pause’ is a user-defined route.
We need to give additional properties to the MaterialApp constructor like below. which includes the initialRoute and routes (where we write the name of a particular screen)
MaterialApp(
      title:  'Player Demo',
       initialRoute:  '/',
       routes: {
        '/' : (context) => const HomeScreen(),
         '/play' : (context) => const PlayingScreen(),
         '/pause' : (context) => const PauseScreen(),
       },
    )
If you observe the snippet, you can see ‘/’ is set as an initial route. (using initialRoute:). The app with the “/” named route.
In this case, the app begins on the HomeScreen widget.
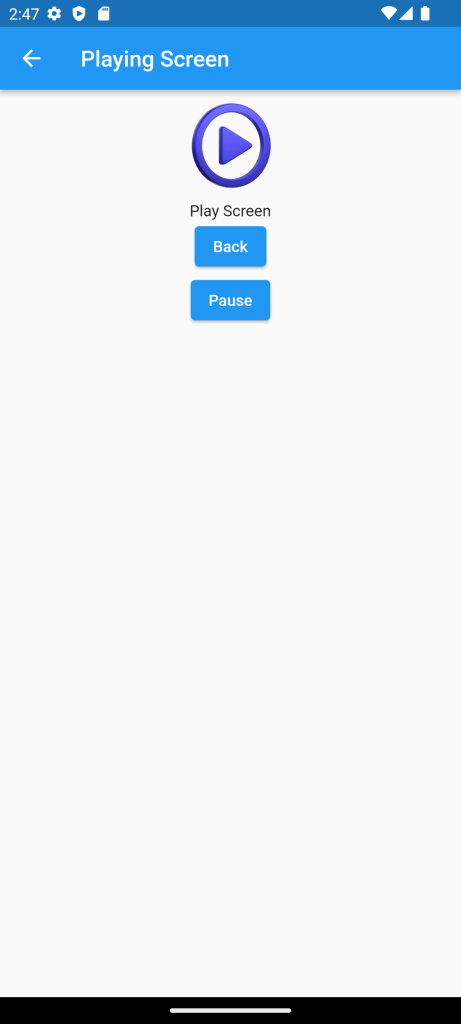
‘/play’ represents the PlayScreen widget.
‘/pause’ represents the PauseScreen widget.
Let’s navigate to the next screen.
The Navigator.pushNamed() is a handy method. It can able to handle named routes.
ElevatedButton(
              onPressed: ()
              {
                Navigator.pushNamed(context, '/play');
              }, child:  const Text("Play screen"),
            ),
Let’s return back to the Home Screen.
onPressed: () {
  Navigator.pop(context);
}
Full Code: Route Navigation in Flutter
import 'package:flutter/material.dart';

void main() {
  runApp(MaterialApp(
    debugShowCheckedModeBanner: false,
    title: 'Player Demo',
    initialRoute: '/',
    routes: {
      '/': (context) => const HomeScreen(),
      '/play': (context) => const PlayingScreen(),
      '/pause': (context) => const PauseScreen(),
    },
  ));
}

class HomeScreen extends StatelessWidget {
  const HomeScreen({Key? key}) : super(key: key);

  @override
  Widget build(BuildContext context) {
    return Scaffold(
      appBar: AppBar(
        title: const Text('Home Screen'),
      ),
      body: Center(
        child: Column(
          children: [
            Image.network(
              "https://icons.iconarchive.com/icons/uiconstock/socialmedia/256/itunes-icon.png",
              width: 100,
              height: 100,
            ),
            ElevatedButton(
              onPressed: () {
                Navigator.pushNamed(context, '/play');
              },
              child: const Text("Play screen"),
            ),
          ],
        ),
      ),
    );
  }
}

class PlayingScreen extends StatelessWidget {
  const PlayingScreen({Key? key}) : super(key: key);

  @override
  Widget build(BuildContext context) {
    return Scaffold(
      appBar: AppBar(
        title: const Text("Playing Screen"),
      ),
      body: Center(
        child: Column(
          children: [
            Image.network(
              "https://cdn3d.iconscout.com/3d/premium/thumb/play-button-8292706-6612691.png?f=webp",
              width: 100,
              height: 100,
            ),
            const Text("Play Screen"),
            ElevatedButton(
                onPressed: () {
                  Navigator.pop(context);
                },
                child: const Text("Back")),
            ElevatedButton(
                onPressed: () {
                  Navigator.pushNamed(context, '/pause');
                },
                child: const Text("Pause")),
          ],
        ),
      ),
    );
  }
}

class PauseScreen extends StatelessWidget {
  const PauseScreen({Key? key}) : super(key: key);

  @override
  Widget build(BuildContext context) {
    return Scaffold(
      appBar: AppBar(
        title: const Text("Pause Screen"),
      ),
      body: Center(
        child: Column(
          children: [
            Image.network(
              "https://cdn3d.iconscout.com/3d/premium/thumb/pause-button-8292705-6612690.png",
              width: 100,
              height: 100,
            ),
            const Text("Pause Screen"),
            ElevatedButton(
                onPressed: () {
                  Navigator.pop(context);
                },
                child: const Text("Back"))
          ],
        ),
      ),
    );
  }
}
For More : To know about Tabbar in Flutter
Leave a Reply